
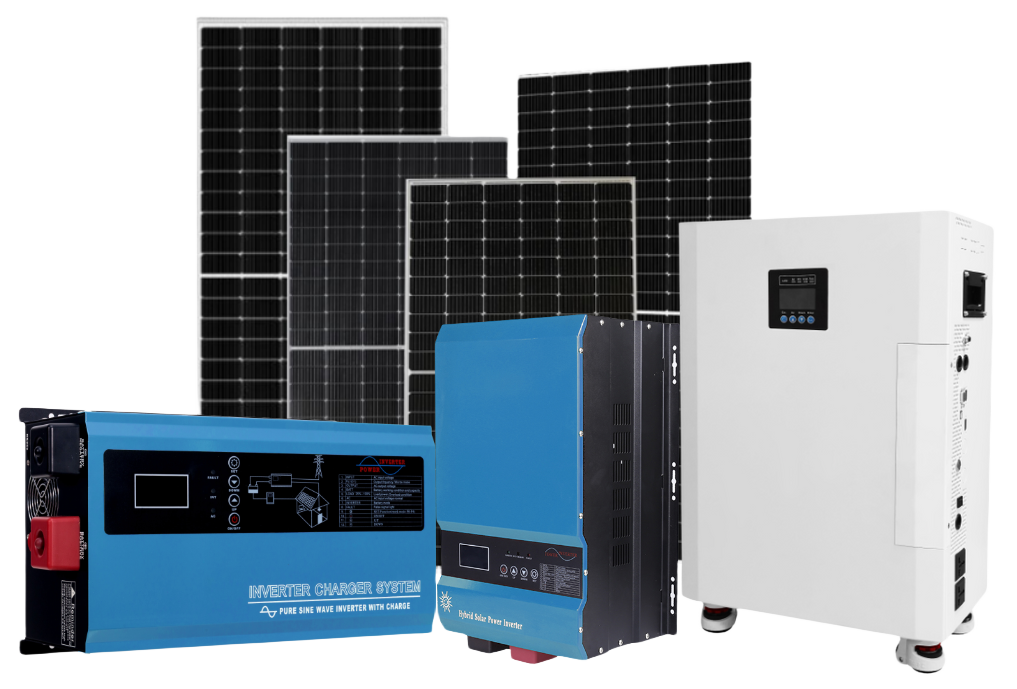
To set up the inverter of a solar system, you need to connect the solar charge controller to the battery, connect the solar panels to the charge controller, and then connect the battery to the inverter. Ensure all connections are secure and grounded before testing the system.
Let’s go step-by-step to ensure that your inverter is set up properly for optimal performance.
1. Choosing the Right Inverter for Your System
Before setting up your solar inverter, it’s important to choose the right type of inverter for your system. There are three main types of inverters:
- String Inverters: These are the most commonly used in residential and commercial solar installations. A string inverter connects a series (or “string”) of solar panels, converting the combined output of all panels at once. This type of inverter is typically more cost-effective and ideal for installations where all panels receive equal sunlight exposure. However, if one panel is shaded or underperforms, it can affect the performance of the entire string.
- Microinverters: Microinverters are installed on each solar panel individually, making them an excellent choice for installations where some panels might experience shading or be oriented differently. Since each panel operates independently, a shaded panel won’t affect the output of the others. This setup maximizes the overall system efficiency in complex environments.
- Hybrid Inverters: Hybrid inverters are designed to work with both solar panels and battery storage systems, allowing for energy storage and grid backup. These inverters offer flexibility, making them ideal for systems where users want to store excess energy for use at night or during outages.
How to Choose the Right Inverter
- For typical residential installations with consistent sunlight exposure, string inverters are usually sufficient and cost-effective.
- If your installation involves shading or panels facing different directions, microinverters provide better efficiency and performance.
- If you plan to include a battery storage system, hybrid inverters are the best choice, offering flexibility in energy management.

2. Selecting a Location for the Inverter
Choosing the right location for your solar inverter is essential for ensuring both safety and optimal performance. If the inverter is not installed in the proper environment, it can overheat, which reduces efficiency and can lead to long-term damage. For this reason, it’s important to place your inverter in a well-ventilated area that is protected from direct sunlight, excessive dust, and moisture.
Tips for Selecting a Location
2.1) Indoors vs. Outdoors
Ideally, inverters should be installed indoors in a cool, dry, and shaded environment like a garage, utility room, or basement. These locations offer natural protection from the elements. If indoor installation isn’t an option, outdoor installation is possible, but the inverter must be housed in a weatherproof enclosure to protect it from rain, humidity, and extreme temperatures. Specialized enclosures designed for outdoor inverters are recommended.
2.2) Ventilation
Inverters need proper ventilation to dissipate the heat they generate during operation. Ensure the installation site provides sufficient airflow around the inverter, especially if it’s mounted on a wall. Avoid confined spaces, and leave enough clearance on all sides to promote airflow. Installing the inverter in a space with good air circulation will help prevent overheating.
2.3) Shaded Area
Whether indoors or outdoors, keep the inverter out of direct sunlight. Constant exposure to sunlight can cause the inverter to overheat, reducing its efficiency and lifespan. Installing it in a shaded or naturally cool area helps maintain optimal operating temperatures.
By carefully selecting the location for your inverter, you ensure that it operates efficiently and lasts longer, minimizing the risk of overheating and damage.

3. Connecting the Charge Controller to the Battery
The charge controller is a crucial component in your solar system, as it regulates the flow of electricity from the solar panels to the battery. Its primary function is to ensure that the battery does not overcharge, which could lead to overheating, damage, or even hazardous situations. Steps for connecting the charge controller to the battery as below:
3.1) Ensure Correct Polarity
When connecting the charge controller to the battery, it is critical to match the positive and negative terminals correctly. This prevents short circuits and damage to the system. Use properly rated cables that can handle the voltage and current of your solar setup. Most charge controllers will have clear markings to indicate where the positive and negative connections should be made. Double-check these connections before proceeding to the next step.
3.2) Use Proper Connectors
Always use connectors that are designed to match your system’s amperage and voltage rating. Proper connectors ensure secure and reliable connections, minimizing the risk of loose connections, which could lead to power loss or even fire hazards. Invest in quality connectors and avoid using makeshift solutions like makeshift clamps or tape.
4. Wiring the Solar Panels to the Charge Controller
Once your charge controller is connected to the battery, the next crucial step is wiring the solar panels to the charge controller. This connection ensures that the energy generated by your solar panels is regulated and managed efficiently before it’s stored in the battery.
4.1) Connect Positive and Negative Terminals
To ensure a safe and efficient connection, match the positive terminal of the solar panel array to the positive input on the charge controller and do the same for the negative terminals. Most solar panels and charge controllers are clearly labeled to indicate the positive (+) and negative (-) terminals, but double-checking this step is vital. Reversing the polarity can cause serious damage to the system or even pose safety hazards, such as overheating or short circuits.
4.2) Check Voltage and Current
Before making the final connections, ensure that the total voltage and current from the solar panel array are within the operating range of your charge controller. Exceeding these specifications can cause the charge controller to malfunction or even fail.
For example, a charge controller rated for 12V systems may not handle the higher voltages from a 24V or 48V solar array unless it is designed to do so. Always check the manufacturer’s specifications to match the system components correctly.
4.3) Series vs. Parallel Connections
Depending on your system’s design, you may need to wire your solar panels in series or parallel:
- Series Wiring: When you connect panels in series, the voltage increases while the current stays the same. This is ideal for systems that require higher voltage, such as 24V or 48V systems. In this setup, the positive terminal of one panel connects to the negative terminal of the next.
- Parallel Wiring: In a parallel connection, the voltage stays the same while the current increases. This configuration is useful for systems that need higher current output, such as for larger battery banks or when using lower voltage panels. For parallel wiring, all positive terminals are connected together, as are all the negative terminals.

5. Connecting the Battery to the Inverter
Once the charge controller is connected to the battery, the next step is to connect the battery to the inverter, which converts the stored DC energy into usable AC power for your home or business.
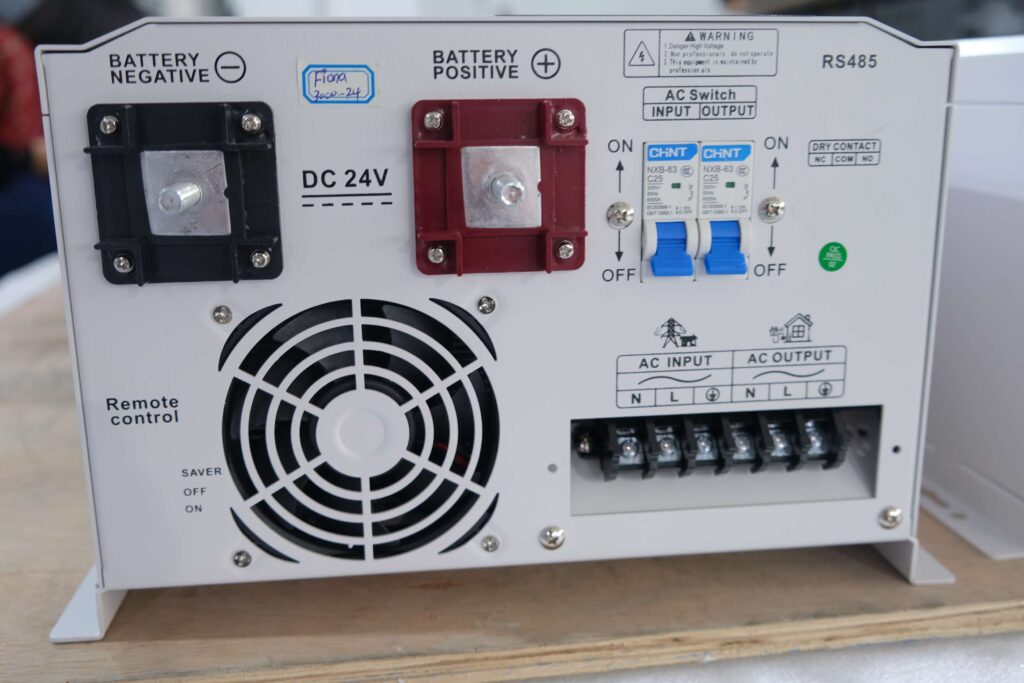
5.1) Connect Positive and Negative Cables
The first step is to ensure correct polarity when connecting the battery to the inverter. The positive terminal of the battery should be connected to the positive terminal of the inverter, and the same for the negative terminals. It’s important to use cables rated for the voltage and current of your system, as using undersized or incorrect cables can lead to overheating and energy losses. Double-check these connections to avoid reversing polarity, which could damage both the battery and the inverter.
5.2) Ground the Inverter
Grounding is a critical safety measure that helps protect your solar power system and the surrounding environment from electrical hazards such as short circuits or electrical surges. Ensure the inverter is properly connected to a grounded surface, such as a grounding rod or the electrical panel’s grounding system. Many inverters have a grounding terminal specifically for this purpose. Follow the manufacturer’s instructions for the correct grounding procedure.
5.3) Cable Sizing
The size of the cables used to connect the battery to the inverter plays a significant role in ensuring the safe and efficient flow of electricity. Cables that are too small for the current can overheat, causing a fire risk or reducing system efficiency. Refer to the inverter’s manual to select the correct gauge of cables that can handle the maximum output power of the inverter. Larger inverters may require thicker cables to manage higher power loads.
6. Testing the System
Once all the components of your solar power system are connected, it’s crucial to thoroughly test the system to ensure everything is functioning as expected. Testing the system before putting it under full load can help you identify any potential issues early on and prevent damage to the components.
Steps for Testing
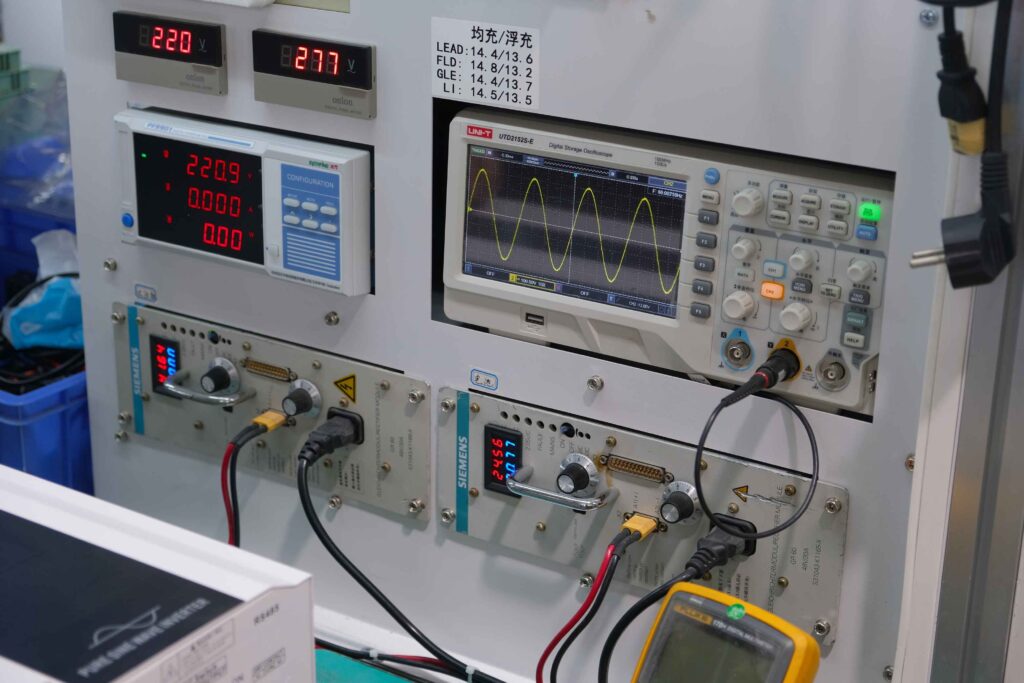
6.1) Check Battery Voltage
Before turning on the system, use a multimeter to check the voltage of the battery. This ensures that the battery is charged and that the voltage is within the expected range. If the voltage is too low, it could indicate that the battery isn’t charged enough, which could lead to operational issues.
Check the manufacturer’s specifications for the correct voltage range. For example, in a 12V system, the battery voltage should typically be between 12.4V and 12.7V when fully charged.
6.2) Turn On the Inverter
After confirming that the battery is charged, switch on the inverter. Monitor the inverter’s display (if available) to ensure that it’s receiving the correct DC voltage from the battery and that it’s converting the power into AC correctly.
Many inverters have indicator lights or a display that shows whether the system is operating normally. If the inverter shows any warning lights or errors, refer to the troubleshooting section of the inverter’s manual to diagnose the issue.
6.3) Check the Load
To complete the test, plug in a small appliance or device (such as a light bulb, fan, or phone charger) into the inverter to verify that it is providing stable AC power. Watch the appliance to ensure that it operates normally without any fluctuations or interruptions.
This step ensures that the inverter is successfully converting DC power from the battery into usable AC power for your home or business.

Common Mistakes to Avoid During Inverter Setup
Setting up an inverter is a critical step in any solar power system, but there are several common mistakes that can occur during the installation process. These mistakes can lead to system inefficiencies, safety hazards, or even damage to the inverter and other components. By being aware of these pitfalls, you can ensure a smooth and safe installation that maximizes your solar system’s performance.
Improper Grounding
One of the most common mistakes in inverter installation is failing to properly ground the system. Grounding is essential for preventing electrical hazards, such as electric shocks, short circuits, or surges. Without proper grounding, the inverter and other system components could become unsafe, especially in the event of a fault or lightning strike.
Always follow the inverter manufacturer’s grounding instructions carefully, ensuring that the inverter is connected to an appropriate earth ground or grounding rod. If you’re unsure, consulting a qualified electrician is recommended to avoid safety risks.
Incorrect Wire Sizing
Using cables that are too small for the inverter’s power requirements is another frequent mistake. Wires that are undersized for the current running through them can overheat, leading to power loss, energy inefficiency, or even fire hazards.
The gauge (thickness) of the wire must be matched to the system’s voltage and current ratings, as specified in the inverter manual. Thicker cables (lower gauge numbers) are necessary for high-power systems to safely handle the electrical load without causing overheating. Using the right wire size ensures optimal energy transfer and prevents system failure.
Overloading the Inverter
Inverters are designed to handle a specific amount of power, and exceeding this limit can cause the inverter to shut down or fail. Overloading occurs when you connect more appliances or devices than the inverter is rated for, pushing the inverter beyond its capacity.
To avoid this, calculate the total wattage of the devices you plan to run and ensure it stays within the inverter’s rated output. Always leave some buffer to avoid maxing out the inverter, which ensures long-term reliability and prevents unexpected shutdowns.
Conclusion
Setting up the inverter of a solar system is a crucial step that requires careful planning and precise execution. From selecting the right inverter for your setup to ensuring that all connections are secure and properly grounded, following the correct steps will maximize your system’s efficiency and longevity. At SolarCtrl, we understand the importance of delivering high-quality inverters and providing reliable technical support to ensure your solar system performs at its best.
Need help with your solar installation or sourcing the right inverter for your project? Contact SolarCtrl today and let us help you power your business with clean, reliable energy solutions!
FAQs
1. What is the best type of solar inverter for home use?
The best type of solar inverter for home use depends on your system size, budget, and specific needs. String inverters are widely used for residential systems because they are cost-effective and reliable for medium to large setups. Microinverters are great for systems where each panel’s performance may vary due to shading or other factors. Hybrid inverters are ideal if you plan to integrate a battery storage system.
2. How do I size a solar inverter for my solar power system?
To size a solar inverter, match the total wattage of your solar panel array to the inverter’s capacity. For example, if you have 10 panels rated at 300 watts each, your total system output is 3,000 watts (3 kW), and you should select an inverter with a capacity of 3 kW or slightly higher to handle the load efficiently. Over-sizing or under-sizing can result in inefficiency or system damage.
3. How long does it take to set up a solar inverter?
Installing a solar inverter typically takes between 2 to 4 hours, depending on the complexity of the system, the type of inverter, and the experience of the installer. Additional time may be needed for testing and troubleshooting.
4. Do I need a battery with my solar inverter setup?
No, a battery is not required for all solar inverter setups. Grid-tied systems generally do not need a battery, as excess energy is fed into the grid. However, if you want energy storage for backup or to use solar power at night, you will need a hybrid inverter and a battery storage system.
5. What safety precautions should I take when installing a solar inverter?
Key safety precautions include turning off all power sources before starting installation, wearing insulated gloves, using proper tools, ensuring correct grounding, and following local electrical codes. It is also recommended to install circuit breakers and surge protection devices to safeguard your system.


2 Responses
Awesome. Highly technical and precise. Nice work
Thank you very much for your encouragement! I’m glad the explanation was helpful and met your technical needs. If you have more questions about solar systems or need advice for your project, feel free to ask anytime. I’m here to assist!